# Angular Integration Guide
> Getting started with Angular
Canonical URL: https://docs.minaprotocol.com/zkapps/front-end-integration-guides/angular
## Install a Wallet
- Install a wallet that supports zkApp transactions. For this tutorial, we’ll use **Auro Wallet** (v2.3.1). [Download it here](https://www.aurowallet.com/).
- Add the Auro Wallet browser extension.
- Open the extension and follow the steps to create a new wallet.
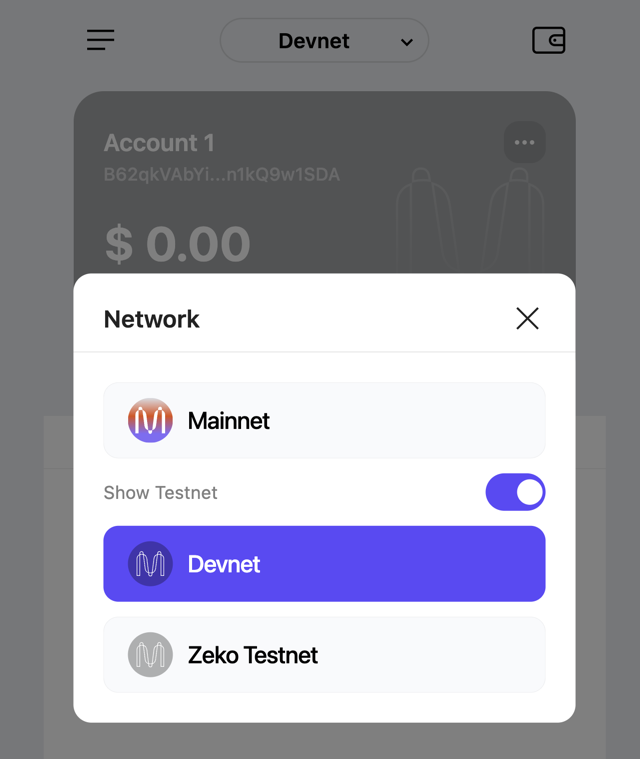
- Click **"Mainnet"** at the top of the extension view, then select **"Show Testnet"** from the menu. After that, select **"Devnet"**.
- Using Devnet will allow us to interact with a test version of the Mina network without needing to spend real Mina to pay for transaction fees.
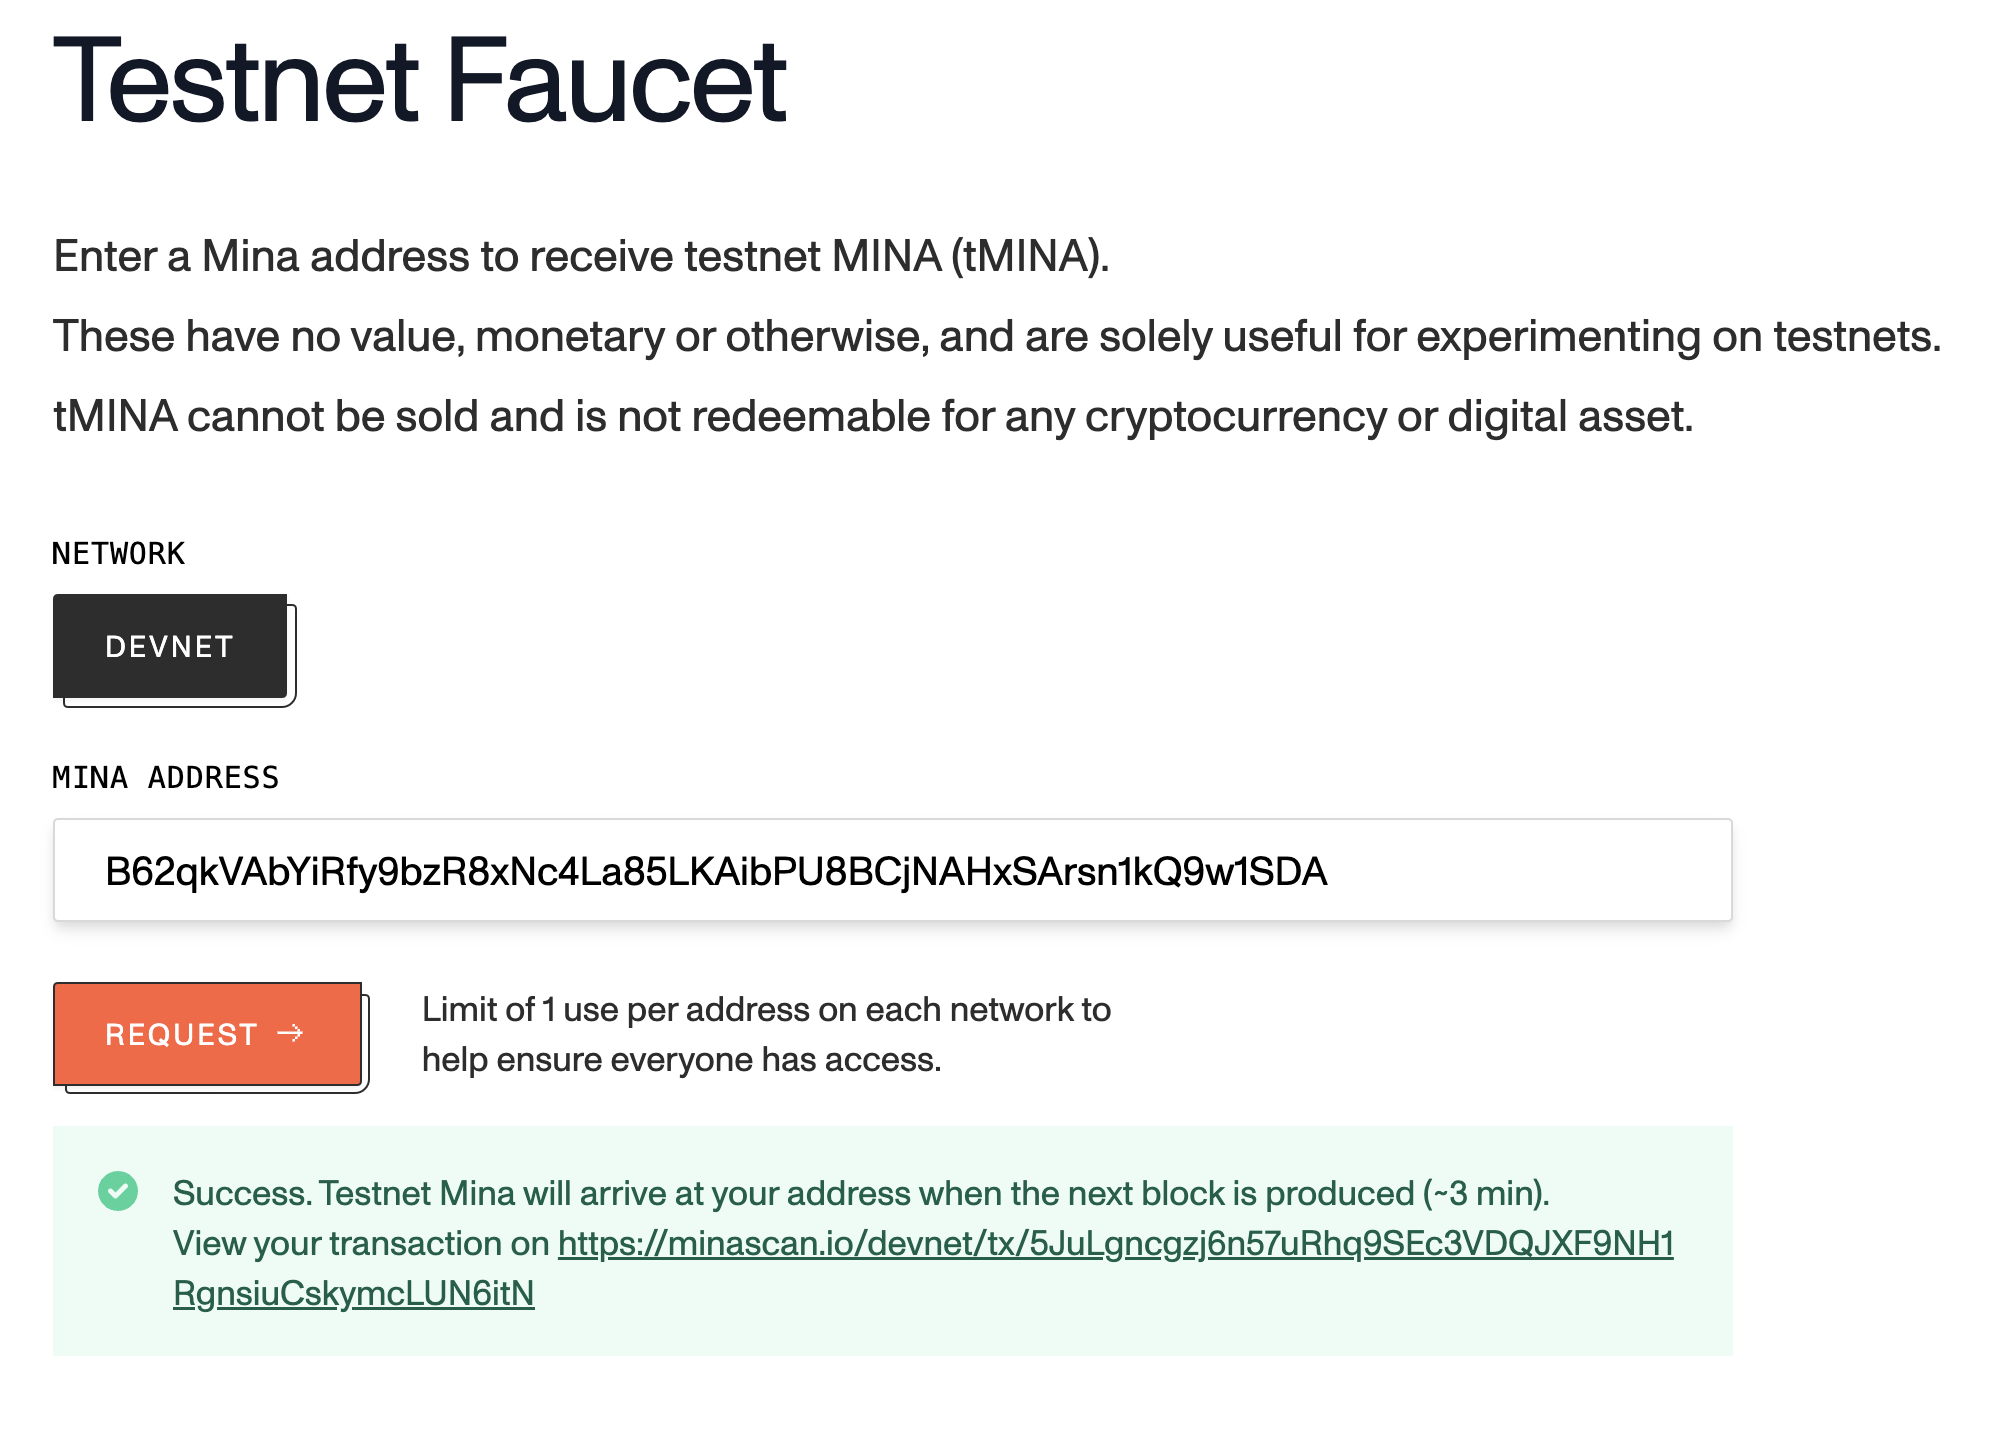
- Fund your wallet using the [Mina Faucet](https://faucet.minaprotocol.com/).
- You'll need to wait one block (~90 seconds) to see the change in balance reflected on chain. You can use [Minascan](https://minascan.io/devnet) to track the status of your transaction.
## Initialize the Project
- Install the Angular CLI globally:
```bash
npm install -g @angular/cli@19
```
- Create a new Angular project by running:
```bash
ng new
```
- Configure the project
- For **Which stylesheet format would you like to use?**, select CSS.
- For **Do you want to enable Server-Side Rendering (SSR) and Static Site Generation (SSG/Prerendering)? (y/N)**, choose **No**.
- Install the `o1js` library:
```bash
cd
npm install o1js@2
```
- Start the local development server.
- This command runs `ng serve` which we will further configure by changing `options` under the `serve` build target in `angular.json`.
```bash
npm run start
```
## Create the ZkApp Contract
- Navigate out of the demo project directory and install the `zkapp-cli` globally:
```bash
cd ../
npm install -g zkapp-cli@0.22.3
```
- Initialize a new zkapp with the CLI. When prompted to create a UI project, select **none**.
```bash
zk project add
```
- Change into the newly created `add` directory and build the contract:
```bash
cd add
npm run build
```
- We've already deployed an instance of the default `Add` contract to Devnet at [B62qnTDEeYtBHBePA4yhCt4TCgDtA4L2CGvK7PirbJyX4pKH8bmtWe5](https://minascan.io/devnet/account/B62qnTDEeYtBHBePA4yhCt4TCgDtA4L2CGvK7PirbJyX4pKH8bmtWe5) so you won't need to deploy the contract you just created. You'll still need to include the contract code in your project so that it can be compiled into a verification key and proving key.
- The proving key enables users to generate proofs of valid contract execution directly in their browsers. A user can run a contract call locally, create a proof of its execution using the proving key, and then publish the proof on-chain to update the zkApp’s state. Since the verification key is stored on-chain, the network will accept a transaction sent to this address if it includes a proof generated with the proving key that matches the on-chain verification key.
## Call Contracts
- Move back into the Angular project.
- To interact with the deployed `Add` contract, we’ll add code to fetch the current state and initiate a transaction. This code will execute only in the browser, so we'll add it to `afterNextRender` in the constructor of `src/app/app.component.ts`.
- `afterNextRender` only runs after the Angular component has fully rendered.
- The Auro wallet injects a Mina provider into the global context. It is accessible as `window.mina`.
```tsx
@Component({
selector: 'app-root',
standalone: true,
imports: [RouterOutlet],
templateUrl: './app.component.html',
styleUrl: './app.component.css'
})
export class AppComponent {
// replace with your project name!
title = '';
constructor() {
afterNextRender(async () => {
const {Mina, PublicKey, fetchAccount} = await import('o1js');
const {Add} = await import('../../../add');
// connect the Mina instance to testnet
Mina.setActiveInstance(Mina.Network('https://devnet-plain-1.gcp.o1test.net/graphql'));
// we've already deployed the Add contract on testnet at this address
// https://minascan.io/devnet/account/B62qnTDEeYtBHBePA4yhCt4TCgDtA4L2CGvK7PirbJyX4pKH8bmtWe5
const zkAppAddress = `B62qnTDEeYtBHBePA4yhCt4TCgDtA4L2CGvK7PirbJyX4pKH8bmtWe5`;
await fetchAccount({publicKey: zkAppAddress});
const zkApp = new Add(PublicKey.fromBase58(zkAppAddress));
// Read state from the testnet Add contract
console.log(`Reading state of add contract at ${zkAppAddress}: num=${zkApp.num.get()}`);
try {
// retrieve the injected mina provider if it exists
const mina = (window as any).mina;
const walletKey: string = (await mina.requestAccounts())[0];
console.log(`Injected mina provider address: ${walletKey}`);
await fetchAccount({publicKey: PublicKey.fromBase58(walletKey)});
console.log("Compiling Add");
await Add.compile();
console.log("Compiled Add");
// send a transaction with the injected Mina provider
const transaction = await Mina.transaction(async () => {
await zkApp.update();
});
await transaction.prove();
const {hash} = await mina.sendTransaction({
transaction: transaction.toJSON(),
});
// display the link to the transaction
const transactionLink = `https://minascan.io/devnet/tx/${hash}`;
console.log(`View transaction at ${transactionLink}`);
} catch (e: any) {
console.error(e.message);
if (e.message.includes("Cannot read properties of undefined (reading 'requestAccounts')")) {
console.error("Is Auro installed?");
} else if (e.message.includes("Please create or restore wallet first.")) {
console.error("Have you created a wallet?");
} else if (e.message.includes("User rejected the request.")) {
console.error("Did you grant the app permission to connect to your wallet?");
} else {
console.error("An unknown error occurred:", e);
}
}
});
}
}
```
- The above code:
- Connects Mina to a Devnet node so transactions are broadcasted to Devnet.
- Requests the user's address from the mina provider injected into the browser context by the wallet.
- Compiles the `Add` zkApp contract to generate and cache the proving key, which will allow the app to create proofs for transactions.
- Creates a zkapp transaction calling `update` on the `Add` contract.
- Proves the transaction using the proving key which o1js has internally cached.
- Prompts the user to broadcast the transaction to the network with their wallet.
- Now run the application in your browser with `npm run start` (which executes `ng serve`) and open the browser console.
- Approve the connection request displayed in Auro.
## SharedArrayBuffer Headers for `ng serve`
- You'll see that some of the code works, like the on-chain state retrieval, but compiling a zkapp fails with `DataCloneError: Failed to execute 'postMessage' on 'Worker': SharedArrayBuffer transfer requires self.crossOriginIsolated`.
- `SharedArrayBuffer` is a JavaScript object that lets different threads share memory. Since o1js's proving is very computationally intensive, we us WASM workers for parallel processing in the browser.
- For security reasons, `SharedArrayBuffer` needs certain headers to be set. These prevent cross origin resources (scripts and content loaded from external domains, iframes, and popups) from accessing shared memory.
- Cross-Origin-Opener-Policy (COOP) must be set to `"same-origin"` to prevents cross-origin resources from accessing the main document’s memory.
- Cross-Origin-Embedder-Policy (COEP) must be set to `"require-corp"` to restrict the way cross origin resources can be loaded by the main document. They'll either need to be from the same origin or include the `Cross-Origin-Resource-Policy: cross-origin` header.
- Depending on how the application is being run, there are different ways to set these headers. Running the application locally with `ng serve` uses `@angular-devkit/build-angular:dev-server"` which we can configure in the project's `angular.json` file at `/projects//architect/serve/configurations/development`.
- Architect is Angular's task runner, the entries (called build targets) under `architect` each represent tasks that the Angular CLI can run (`ng build`, `ng serve`, `ng test`, etc). The `builder` property of each target specifies the program that Architect should run to execute the task. The `options` can be used to supply parameters to the builder, and the `configurations`specifies a custom set of options for different target configurations (development, production, etc).
- Running `ng serve` locally runs the `@angular-devkit/build-angular:dev-server` builder, and in its options object we can specify custom headers specifying the headers required for `SharedArrayBuffer` as follows:
```json
"serve": {
"builder": "@angular-devkit/build-angular:dev-server",
+ "options": {
+ "headers": {
+ "Cross-Origin-Opener-Policy": "same-origin",
+ "Cross-Origin-Embedder-Policy": "require-corp"
+ }
+ },
"configurations": {
"production": {
"buildTarget": "angular-demo:build:production"
},
"development": {
"buildTarget": "angular-demo:build:development"
}
},
"defaultConfiguration": "development"
},
```
- Restart the server with `npm run start` and view the application in the browser again - the `SharedArrayBuffer` error should be gone!
## Loading o1js
- We still have another error: `Uncaught ReferenceError: __async is not defined`.
- This one comes from the way Angular bundles dependencies internally. We'll address it by supplying our own custom webpack config which will exclude o1js from the bundle generated by Angular. Then we'll copy o1js into our static assets directory so it's served with the app and use import maps to import o1js directly.
### Create a Custom Webpack Config
- Start by creating a custom webpack config by adding a file `webpack.config.js` at the root of your project with the following contents:
```jsx
module.exports = {
externals: {
'o1js': 'o1js'
}
};
```
### Update Builders to Use Custom Webpack
- Install builders which support using custom webpack configs - Angular's default builder will ignore the webpack file.
```bash
npm install @angular-builders/custom-webpack@19
```
- Update the `serve` and `build` build targets to use the `@angular-builders/custom-webpack` builders and load the file.
- In `angular.json` under `/projects//architect/build`, replace the default builder `"builder": "@angular-devkit/build-angular:application",` with `"builder": "@angular-builders/custom-webpack:browser"`.
- rename the `browser` property to `main` in `options`.
- add `"customWebpackConfig": { "path": "./webpack.config.js" },` to `options`.
- In `angular.json` under `/projects//architect/serve`, replace the default builder `"builder": "@angular-devkit/build-angular:dev-server",` with `"builder": "@angular-builders/custom-webpack:dev-server"`.
- The changes to your build targets should look like this:
```json
"architect": {
"build": {
- "builder": "@angular-devkit/build-angular:application",
+ "builder": "@angular-builders/custom-webpack:browser",
"options": {
+ "customWebpackConfig": { "path": "./webpack.config.js" },
"outputPath": "dist/angular-demo",
"index": "src/index.html",
- "browser": "src/main.ts",
+ "main": "src/main.ts",
"polyfills": [
"zone.js"
],
"tsConfig": "tsconfig.app.json",
"assets": [
{
"glob": "**/*",
"input": "public"
}
],
"styles": [
"src/styles.css"
],
"scripts": []
},
"configurations": { ... },
"defaultConfiguration": "production"
},
"serve": {
- "builder": "@angular-devkit/build-angular:dev-server",
+ "builder": "@angular-builders/custom-webpack:dev-server",
"options": {
"headers": {
"Cross-Origin-Opener-Policy": "same-origin",
"Cross-Origin-Embedder-Policy": "require-corp"
}
},
"configurations": { ... },
"defaultConfiguration": "development"
},
```
### Copy o1js into Static Assets
- Now we'll write a script to copy o1js into `public` where our static assets are served along with the application and then import it directly with an `importmap`.
- Add a script to `package.json` that copies o1js from `node_modules` to a new directory at `public/lib/o1js`.
- Files under public are served with the app, so the file itself will be available at `http://localhost:4200/lib/o1js/index.js`.
```json
"copy-libs": "mkdir -p public/lib/o1js && cp node_modules/o1js/dist/web/index.js public/lib/o1js/index.js"
```
- Add the `copy-o1js-lib` task to the build script and the start script.
```json
"build": "npm run copy-libs && ng build",
"start": "npm run copy-libs && ng serve"
```
- Add `public/lib` to `.gitignore`.
### Load o1js with an `importmap`
- Above the closing `` tag in `src/index.html` add these scripts to import o1js from `public/lib/o1js`:
```html
...
```
- Now instead of importing o1js as a regular npm dependency, we declare it as a top level variable in app component knowing that it will exist in the global context of the browser at runtime. Add the following to the top of `src/app.component.ts`:
```tsx
// at the top of the file:
declare var o1js: typeof o1jsTypes;
```
- Remove the import of o1js inside of `afterNextRender` and replace it with this:
```tsx
- const {Mina, PublicKey, fetchAccount} = await import('o1js');
+ const {Mina, PublicKey, fetchAccount} = o1js;
```
## Running the App Locally
- Congratulations! The app should work as expected when served with `npm run start` (`ng serve`).
- Restart the application with `npm run start`.
- Verify that `Set the global o1js instance: Module {…}` was logged in the console, indicating that o1js was successfully loaded from our public assets.
- Verify that the current `num` on the `Add` zkapp is logged, meaning that we're successfully reading state from the contract at `B62qnTDEeYtBHBePA4yhCt4TCgDtA4L2CGvK7PirbJyX4pKH8bmtWe5` on Devnet.
- Verify that "Compiled Add" is logged, meaning that the SDK has successfully generated a proving key for the `Add` zkapp.
- If you're connected to Devnet and your account is funded with Devnet tokens, you should be be able to broadcast a successful transaction calling `update` on the zkapp. After a few minutes, the state change associated with the transaction will take effect on chain and you'll see `num` increase when you reload the page!
## Deploying to GitHub Pages
- Now we'll set the app up for deployment to GitHub pages.
- Publish your project to a GitHub repository with the same name.
- Run `ng deploy` and select GitHub Pages.
```bash
ng deploy
```
- Add `baseHref` to `options` under `build` in angular.json with the name of your GitHub repository.
- **Do not remove the slashes!**
```json
"baseHref": "//"
```
- Create a deploy script in package.json which copies the required libraries
```json
"deploy": "npm run copy-libs && ng deploy --dir=dist/"
```
- Deploy the app.
```bash
npm run deploy
```
- You can view deployment details at `https://github.com///actions` and your live site at `https://.github.io//`.
## SharedArrayBuffer in Deployed Instance
- View the site and open the browser console. You'll see the same error about the SharedArrayBuffer from before! The headers set previously apply only to `ng serve`, so we’ll set them up for GitHub Pages.
- Install `coi-serviceworker`.
```bash
npm install coi-serviceworker@^0.1.7
```
- Update the script that copies `o1js` to `public` to also include the `coi-serviceworker` file:
```json
"copy-libs": "mkdir -p public/lib/o1js && cp node_modules/o1js/dist/web/index.js public/lib/o1js/index.js && cp node_modules/coi-serviceworker/coi-serviceworker.min.js public/coi-serviceworker.min.js"
```
- Import it in your `index.html` file right above the o1js importmap script.
```html
```
- Redeploy the application with the `COIServiceWorker` files.
```bash
npm run deploy
```
## Congratulations, you’ve developed and deployed a zkApp UI with Angular!
Next steps include learning to use web workers to prevent computationally expensive operations like `compile` from blocking the UI thread, handling events, and building more complex zkApp contracts!